Physical Address
304 North Cardinal St.
Dorchester Center, MA 02124
Physical Address
304 North Cardinal St.
Dorchester Center, MA 02124

[ad_1]
Selecting a manner for storing information completely is one thing that’s at all times wanted when growing purposes. There are numerous choices we will choose from: To create single information, to make use of CoreData or create a SQLite database. The final choice consists of some additional problem because the database have to be created first, and all tables and fields to be already outlined earlier than an app makes use of them. Moreover, and from the programming perspective, it’s not that straightforward to handle a SQLite database when information must be saved, up to date or retrieved.
These issues appear to vanish when utilizing a comparatively new library that was popped on the GitHub referred to as SwiftyDB. It’s a third-party library, which, because the creator says, is a plug-and-play element certainly. SwiftyDB reliefs builders from the effort of making a SQLite database manually, and from defining all required tables and fields. That occurs mechanically by the library utilizing the properties of the category (or courses) used as information fashions. Moreover that, all database operations are carried out beneath the hood, so builders can give attention to the implementation of the app logic solely. A easy but highly effective API makes it actually a bit of cake when coping with the database.
It’s vital to say although that you just shouldn’t anticipate SwiftyDB to make miracles. It’s a dependable library that may do fairly nicely what it’s speculated to do, however there are nonetheless some lacking options which are in all probability meant to be added within the (close to or distant) future. Nonetheless, it’s nonetheless remaing an ideal instrument that deserves some particular consideration, due to this fact on this tutorial we’ll undergo the fundamentals of SwiftyDB.
On your reference, yow will discover its documentation right here, which you need to positively see after having gone by this textual content. In the event you had been at all times keen to work with SQLite databases however hesitated to take action, I imagine that SwiftyDB is an effective begin to try this.
With the above mentioned, let’s get going with the exploration of a brand new, fairly promising instrument.
In our publish at this time we’re going to create a extremely easy word taking app able to doing all the fundamental operations one would anticipate:
Apparently, SwiftyDB goes to take cost of managing the info into an SQLite database. All of the listed operations above are ok to display all the pieces you want so can get began working with SwiftyDB simply.
To make it potential for us to remain into the purpose, I’ve created a starter venture which you need to obtain and start with. Once you get it, open it in Xcode and navigate round so that you get acquainted with it. As you’ll see, all the fundamental performance is there, with the many of the data-related options to be lacking. It could be nice should you would additionally run the venture at the very least as soon as, so that you see what’s all about.
The app is navigation based mostly, and within the first view controller there’s a tableview the place all notes are supposed to be listed.
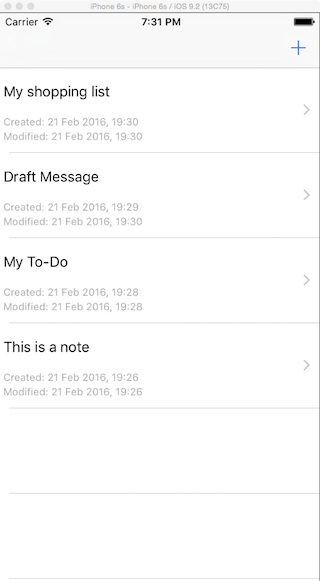
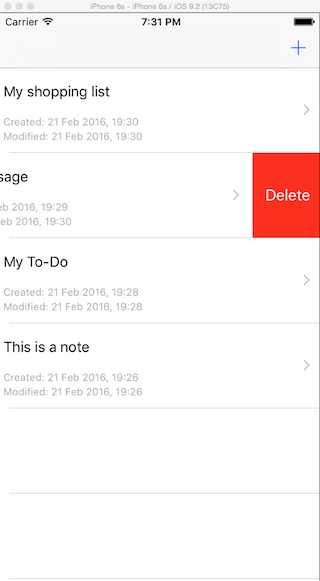
By tapping on an current word we’ll have the ability to edit it and replace it, and when swiping to the left we’ll have the ability to delete it:
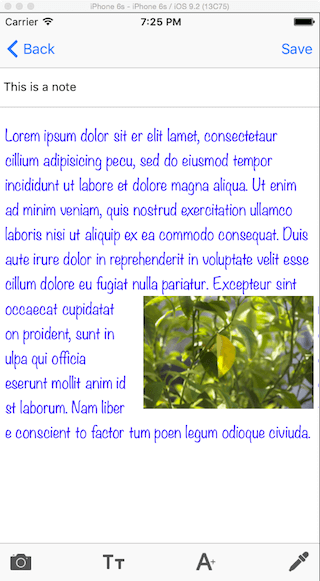
Composing a brand new word is feasible by tapping on the plus (+) button on the navigation bar. So as to have a ok working instance, right here’s a listing of actions that we will carry out when modifying a word (new or current one):
All values matching to the above operations will likely be saved to the database. To make it a bit extra clear for the final two elements particularly, the precise photographs are going to be saved to the paperwork listing of the app, whereas we’re going to save simply the title and body for every picture to the database. However not simply that; moreover we’re going to create a brand new class for managing photographs (with the small print are coming later).
A final however essential element I’ve to say about is that although you’re downloading a starter venture to work on, by the tip of the following half you’ll be having a workspace. That’s as a result of we’ll use CocoaPods to obtain the SwiftyDB library, and some other dependencies that come alongside.
Please get going once you’re as much as it, however first, shut the starter venture you probably have already opened it in Xcode.
The very first thing we’ve got to do is to obtain the SwiftyDB library and use it in our venture. Merely getting the library information and including them to the venture isn’t going to work, so we’ve got to carry out the set up utilizing the CocoaPods dependency supervisor. The method is straightforward, and also you’ll have the ability to do it very quickly in any respect, even you probably have by no means used CocoaPods earlier than. For you reference nevertheless, have a look to the earlier hyperlink.
We’re going to start by putting in CocoaPods to our system. When you have put in CocoaPods already please skip this step. If not then go forward and open Terminal. Sort the next command to put in CocoaPods:
|
sudo gem set up cocoapods |
Press Return, present your password and sit again whereas the obtain course of is going down. Don’t shut Terminal as soon as it’s completed, we’re nonetheless needing it.
Navigate to the folder the place the starter venture exists by utilizing the cd command (nonetheless in Terminal):
|
cd PATH_TO_THE_STARTER_PROJECT_DIRECTORY |
It’s now time to create a Podfile that describes the library (or libraries) we wish to obtain to CocoaPods. The best manner to try this is by typing the next command and let CocoaPods create one for us:
A brand new file named Podfile will likely be created to the venture folder. Open it utilizing a textual content editor (ideally not TextEdit), and modify it in keeping with the following snippet:
|
use_frameworks!
goal ‘NotesDB’ do pod “SwiftyDB” finish |
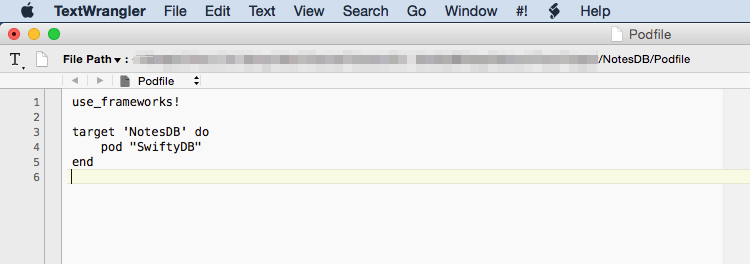
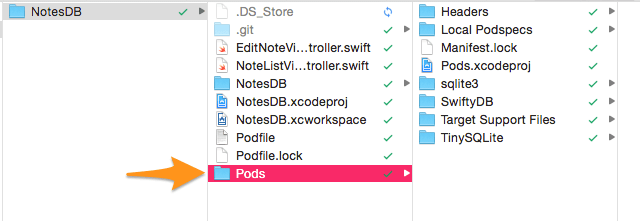
The road that may truly do the entire job is the pod "SwiftyDB". CocoaPods will obtain SwiftyDB library and all of its dependencies by utilizing that line, and it’ll create some new subfolders together with an Xcode workspace.
When you end modifying the file, save and shut it. Then, just remember to’ve closed the starter venture on Xcode and return to Terminal. Sort the following command:
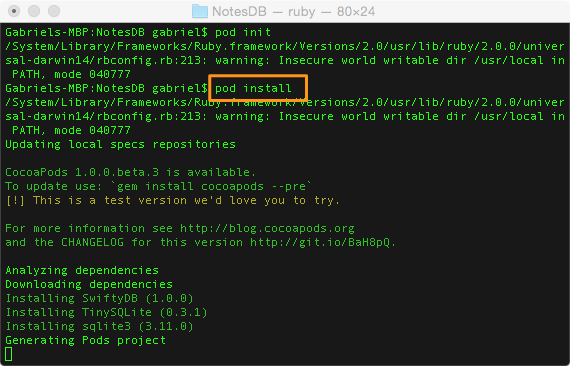
Wait once more for just a few moments, and then you definitely’re able to go. As a substitute of opening the starter venture, open the NotesDB.xcworkspace on Xcode this time.
Contained in the NotesDB venture there’s a file referred to as Observe.swift, but it surely’s presently empty. That is our entry level at this time, as we’re going to create a few courses that may symbolize a word entity programmatically. In a extra theoretical stage, our upcoming work right here consists of the Mannequin half within the iOS MVC sample.
What we’d like initially is to import the SwiftyDB library, in order you guess go to the highest of the file and add this line:
Now, let’s declare our most essential class on this venture:
|
class Observe: NSObject, Storable {
} |
When working with SwiftyDB there are just a few however particular guidelines to comply with, and within the above class header line you’ll be able to see two of them:
NSObject class.Storable protocol (it’s a SwiftyDB protocol).Now we’ve got to think about the properties we wish to have on this class, and right here it comes once more a brand new rule from SwiftyDB: The datatypes of the properties have to be any of these listed right here so as to have the ability to load total Observe objects, as an alternative of easy information (array with dictionaries) when retrieving information from the database. If there are properties with “incompatible” datatypes, then we’ll should take additional actions so we convert them into the advised ones (we’ll see that in particulars in only a whereas). By default, properties with such datatypes are merely ignored by SwiftyDB when it’s about time to save lots of to database, and no respective fields are created to the desk. Additionally, we’ll give particular therapy to some other properties within the class that we don’t actually wish to be saved to the database.
The final rule for now says {that a} class that conforms to the Storable protocol should essentially implement the init technique:
|
class Observe: NSObject, Storable {
override required init() { tremendous.init()
} } |
Now that we’ve got all the data we’d like, let’s begin declaring the properties of our class. Not all for now, as a few of them require further dialogue. Nonetheless, listed here are the fundamentals:
|
class Observe: NSObject, Storable { let database: SwiftyDB! = SwiftyDB(databaseName: “notes”) var noteID: NSNumber! var title: String! var textual content: String! var textColor: NSData! var fontName: String! var fontSize: NSNumber! var creationDate: NSDate! var modificationDate: NSDate!
... } |
Unnecessary to remark any of them, apart from the primary one. When that object will get initialised it’s going to create a brand new database (named notes.sqlite) if it doesn’t exist and it’ll create a desk mechanically. The desk fields will match to the properties having a correct datatype. However, if the database already exists, it’s going to simply open.
As you would possibly discover, the above properties describe a word and all of the attributes we wish to save (title, textual content, textual content shade, font title and dimension, creation and modification dates), however there’s nothing there concerning the photographs {that a} word can presumably have. Deliberately, we’re going to create a brand new class for photographs, the place we’ll retailer two properties solely: The body and the picture title.
So, nonetheless being within the Observe.swift file, create the next class above or under the present one:
|
class ImageDescriptor: NSObject, NSCoding { var frameData: NSData! var imageName: String! } |
Observe that the body is represented as a NSData object on this class, and never as a CGRect. It’s essential to do it that manner, so we will simply retailer that worth to the database later. You’ll see shortly how we’re going to deal with it, and also you’ll additionally perceive why we undertake the NSCoding protocol.
Again to the Observe class, let’s declare an ImageDescriptor array as proven subsequent:
|
class Observe: NSObject, Storable { ...
var photographs: [ImageDescriptor]!
... } |
There’s a limitation that now could be the perfect time to say about, and that’s the undeniable fact that SwiftyDB would not retailer collections to the database. In easy phrases, that implies that our photographs array won’t ever be saved to the database, so we’ve got to determine cope with this. What we’re allowed to do is to make use of one of many supported datatypes (see the hyperlink I supplied a little bit after the start of this half), and probably the most appropriate datatype is NSData. So, as an alternative of saving the photographs array to the database, we’ll be saving the next (new) property:
|
class Observe: NSObject, Storable { ...
var imagesData: NSData!
... } |
However how are we speculated to go from the photographs array with ImageDescriptor objects to the imagesData NSData object? Properly, the reply is by archiving the photographs array utilizing the NSKeyedArchiver class and producing that manner a NSData object. We’ll see later how that is actually being completed in code, however now that we all know what we’ve got to do, we should return to the ImageDescriptor class and have some additions.
As you realize, a category will be archived (in different languages often known as serialized) if solely all of its properties will be serialised too, and in our case that is potential, because the datatypes (NSData and String) of the 2 properties within the ImageDescriptor class are serialisable. Nonetheless that’s not sufficient, as we additionally should encode and decode them as a way to efficiently archive and unarchive respectively, and that’s why we really need the NSCoding protocol. Through the use of it we’ll implement the strategies proven subsequent (considered one of them is an init technique), and we’ll correctly encode and decode our two properties:
|
class ImageDescriptor: NSObject, NSCoding { ...
required init?(coder aDecoder: NSCoder) { frameData = aDecoder.decodeObjectForKey(“frameData”) as! NSData imageName = aDecoder.decodeObjectForKey(“imageName”) as! String }
func encodeWithCoder(aCoder: NSCoder) { aCoder.encodeObject(frameData, forKey: “frameData”) aCoder.encodeObject(imageName, forKey: “imageName”) } } |
For extra details about the NSCoding protocol and the NSKeyedArchiver class have a look right here and right here, it’s pointless to debate extra about them right here and now.
Along with all of the above, let’s outline a fairly helpful customized init technique. It’s actually easy, so no have to make any feedback:
|
class ImageDescriptor: NSObject, NSCoding { ...
init(frameData: NSData!, imageName: String!) { tremendous.init() self.frameData = frameData self.imageName = imageName } } |
At this level our first fast assembly with the SwiftyDB library involves its finish. Though we didn’t do a lot SwiftyDB stuff, this half was vital for 3 causes:
Observe: In the event you’re seeing some errors proper now on Xcode, then construct the venture as soon as (Command-B) to do away with them.
It’s at all times advisable to make use of main keys when coping with databases, as such keys will help you uniquely establish information within the database tables and carry out varied operations by utilizing them (for instance, replace a particular file). Yow will discover right here an excellent definition about what a main key’s.
It’s straightforward to specify a number of properties of a category as the first key (or keys) for the respective desk within the database in SwiftyDB. The library supplies the PrimaryKeys protocol, which ought to be applied by all courses that the respective tables ought to have a main key so their objects to be uniquely recognized. The best way to try this is kind of easy and commonplace, so let’s get into the purpose right away:
Within the NotesDB venture you’ll discover a file named Extensions.swift. Click on it on the Undertaking Navigator so that you open it. Add the next traces there:
|
extension Observe: PrimaryKeys { class func primaryKeys() –> Set<String> { return [“noteID”] } } |
In our demo, we wish the noteID property to be the one main key within the respective desk within the sqlite database. Nonetheless, if extra main keys are required, then you definitely simply have to write down them within the row separated by comma (for instance, return ["key1", "key2", "key3"]).
Moreover that, not all properties of a category ought to at all times be saved to the database, and you need to explicitly order SwiftyDB to not embrace them. For instance, within the Observe class we’ve got two properties that aren’t going to be saved to the database (both as a result of they can not or we don’t need so): The photographs array and the database object. How will we explicitly exclude these two? By implementing one other protocol that the SwiftyDB library supplies referred to as IgnoredProperties:
|
extension Observe: IgnoredProperties { class func ignoredProperties() –> Set<String> { return [“images”, “database”] } } |
If there have been extra properties we wouldn’t wish to should the database they need to be added above too. For instance, let’s say that we’ve got the next property:
… and that we don’t need it to be saved to the database. In that case, we should always add it to the IgnoredProperties protocol implementation too:
|
extension Observe: IgnoredProperties { class func ignoredProperties() –> Set<String> { return [“images”, “database”, “noteAuthor”] } } |
Observe: Import the MARKDOWN_HASH6211c316cc840902a4df44c828a26fbeMARKDOWN_HASH library to the MARKDOWN_HASH1dbda56f2122b1744ebf59bb64bbffdfMARKDOWN_HASH file should you see any errors.
Having completed the naked minimal implementation within the Observe class, it’s time to show to the functionalities of the demo app. We nonetheless haven’t added any strategies to our new class; we’ll accomplish that by following the implementation circulate of all of the lacking functionalities.
So, the very first thing we’d like is having notes, due to this fact the app have to be informed save them correctly utilizing the SwiftyDB and our two new courses. That is going to happen principally within the EditNoteViewController class, so it’s about time to open the respective file utilizing the Undertaking Navigator. Earlier than we write the primary line of code right here, I take into account fairly essential to spotlight the many of the properties discovered there:
imageViews: This array holds all of the picture view objects that include photographs added to a word. Please don’t neglect that this array exists; it’ll grow to be helpful shortly.currentFontName: It holds the title of the presently utilized font to the textview.currentFontSize: It’s the font dimension of the textual content within the textview.editedNoteID: The noteID worth (main key) of a word that’s about to be up to date. We’ll use it later.Because the basic performance already exists within the starter venture, what we’ve got to do is to implement the lacking logic within the saveNote() technique. We’ll start by doing two issues: First we received’t enable saving if there is no such thing as a textual content within the title or the physique of the word. Second, we’ll dismiss the keyboard if it’s appeared by the point of saving:
|
func saveNote() { if txtTitle.textual content?.characters.depend == 0 || tvNote.textual content.characters.depend == 0 { return }
if tvNote.isFirstResponder() { tvNote.resignFirstResponder() } } |
We’ll proceed now by initializing a brand new Observe object, and by assigning the correct values to the correct properties. The photographs want particular therapy, and we’ll do it proper after.
|
func saveNote() { ...
let word = Observe() word.noteID = Int(NSDate().timeIntervalSince1970) word.creationDate = NSDate() word.title = txtTitle.textual content word.textual content = tvNote.textual content! word.textColor = NSKeyedArchiver.archivedDataWithRootObject(tvNote.textColor!) word.fontName = tvNote.font?.fontName word.fontSize = tvNote.font?.pointSize word.modificationDate = NSDate() } |
A number of feedback now:
noteID property expects any Int quantity that may work as the first key. You may create or generate any worth you need so long as it’s distinctive. On this case we set the integer half of the present timestamp as our main key, however typically this isn’t a good suggestion in actual world purposes because the timestamp incorporates too many digits. Nonetheless for our demo software it’s simply tremendous, because it additionally consists of the best choice for having a singular int worth.NSDate object) to each creation and modification date properties.NSData object. That is achieved by archiving the colour object utilizing the NSKeyedArchiver class.Let’s give attention to save the photographs now. We are going to create a brand new technique which will likely be fed with the picture views array. We’ll carry out two issues in it: We’ll save the precise picture of every picture view to the paperwork listing of the app, and we’ll create an ImageDescriptor object for every one. Every such object will likely be appended to the photographs array.
So as to create this new technique we’re going to make a small detour, and to return to the Observe.swift file once more. Let’s see the implementation first, after which we’ll focus on about it.
<
pre lang=”swift”>
func storeNoteImagesFromImageViews(imageViews: [PanningImageView]) {
if imageViews.depend > 0 {
if photographs == nil {
photographs = ImageDescriptor
}
else {
photographs.removeAll()
}
|
for i in 0..<imageViews.depend { let imageView = imageViews[i] let imageName = “img_(Int(NSDate().timeIntervalSince1970))_(i)“
photographs.append(ImageDescriptor(frameData: imageView.body.toNSData(), imageName: imageName))
Helper.saveImage(imageView.picture!, withName: imageName) }
imagesData = NSKeyedArchiver.archivedDataWithRootObject(photographs) } else { imagesData = NSKeyedArchiver.archivedDataWithRootObject(NSNull()) }
|
}
Right here’s what’s going down within the above technique:
photographs array is initialised or not. If it’s nil we initialise it, if not, we simply take away any current information from it. The second will grow to be helpful later, after we’ll be updating an current word.ImageDescriptor object by utilizing our customized init technique and by offering the picture view body and the picture title as parameters. The toNSData() technique has been applied as an extension of the CGRect and yow will discover it within the Extensions.swift file. Its objective is to transform a body to a NSData object. As soon as the brand new ImageDescriptor object is prepared, it’s appended to the photographs array.saveImage(_: withName:) class technique will be discovered within the Helper.swift file, together with couple extra helpful class strategies.photographs array to a NSData object by archiving it and we assign it to the imagesData property. The final line above is the precise cause that the NSCoding protocol and the implementation of its strategies are required within the ImageDescriptor class.The else case above might sound reduntant, but it surely’s required. By default, the imagesData property is nil and it’ll stay like that if no photographs get added to the word. Nonetheless, “nil” isn’t acknowledged by SQLite. What SQLite understands is the equal of NSNull, and that’s what we offer transformed to a NSData object.
Again to the EditNoteViewController.swift file once more to make use of what we simply created:
|
func saveNote() { ...
word.storeNoteImagesFromImageViews(imageViews) } |
Let’s return now to the Observe.swift file, and let’s implement the tactic that may carry out the precise saving to the database. There’s one thing essential you need to know at this level: SwiftyDB supplies the choice to carry out any database-related operation synchronously or asynchronously. Which technique you need to choose will depend on the character of the app you construct. Nonetheless, I’d recommend to make use of the asynchronous technique, as this received’t block the principle thread whereas a database operation is in progress, and it received’t have an effect on the consumer expertise by freezing (even immediately) the UI. However I’m saying once more, it’s completely as much as you.
We’ll use the asynchronous method to save our information in right here. As you’ll see, the respective SwiftyDB technique incorporates a closure that returns the results of the operation. You may learn particulars about that end result object right here, and truly I’m recommending to take action now.
Let’s implement now our new technique so we will focus on extra about it:
|
func saveNote(shouldUpdate: Bool = false, completionHandler: (success: Bool) –> Void) { database.asyncAddObject(self, replace: shouldUpdate) { (end result) –> Void in if let error = end result.error { print(error) completionHandler(success: false) } else { completionHandler(success: true) } } } |
It’s straightforward to grasp from the above implementation that we’re going to make use of the identical technique for updating notes too. We ensure that to set the shouldUpdate Bool worth as a parameter to the tactic prematurely, after which relying on its worth the asyncDataObject(...) will both create a brand new file or it’ll replace an current one.
Moreover, you see that the second parameter in our technique is a completion handler. We name it with the correct parameter worth, relying on whether or not the saving is profitable or not. I’d recommend you to at all times use completion handlers when you will have duties operating asynchronously on the background. That manner, you’ll have the ability to notify the caller strategies when the background job has completed, and switch any potential outcomes or information again.
What you see taking place above is what you’ll see taking place in different database-related strategies too. We’ll at all times be checking for an error within the end result, and we’ll proceed accordingly relying on whether or not there’s any or not. Within the above case if there’s an error, we name our completion handler passing the false worth, which means that the saving was failed. If the other case, we cross true to point a profitable operation.
Again to the EditNoteViewController class as soon as once more, let’s get completed with the saveNote() technique. We’ll name the one created proper above, and if the word saving has been profitable we’ll simply pop the view controller. If there’s an error, then we’ll show a message.
|
1 2 3 4 5 6 7 8 9 10 11 12 13 14 15 16 17 18 19 20 |
func saveNote() { ...
let shouldUpdate = (editedNoteID == nil) ? false : true
word.saveNote(shouldUpdate) { (success) –> Void in dispatch_async(dispatch_get_main_queue(), { () –> Void in if success { self.navigationController?.popViewControllerAnimated(true) } else { let alertController = UIAlertController(title: “NotesDB”, message: “An error occurred and the word couldn’t be saved.”, preferredStyle: UIAlertControllerStyle.Alert) alertController.addAction(UIAlertAction(title: “OK”, fashion: UIAlertActionStyle.Default, handler: { (motion) –> Void in
})) self.presentViewController(alertController, animated: true, completion: nil) } }) } } |
Discover the shouldUpdate variable within the above implementation. It will get the correct worth relying on whether or not the editedNoteID property is nil or not, which means whether or not the word is being up to date or not.
At this level you’ll be able to run the app and attempt to save new notes. In the event you went step-by-step all alongside the way in which up up to now, then you definitely’ll have the ability to save your notes with none issues.
With the creation and saving of recent notes being functioning, we will transfer on and make our app able to loading saved notes from the database. The loaded notes are supposed to be listed within the NoteListViewController class. Nonetheless, earlier than we begin working on this class, let’s create first a brand new technique within the Observe.swift file for loading our information.
|
func loadAllNotes(completionHandler: (notes: [Note]!) –> Void) { database.asyncObjectsForType(Observe.self) { (end result) –> Void in if let notes = end result.worth { completionHandler(notes: notes) }
if let error = end result.error { print(error) completionHandler(notes: nil) } } } |
The SwiftyDB technique that performs the precise loading is the asyncObjectsForType(...), and it really works asynchronously. The end result will include both an error, or a set with word objects (an array) loaded from the database. Within the first case, we name the completion handler passing the nil worth in order to point to the caller that there was an issue whereas loading the info. Within the second case, we cross the Observe objects to the completion handler so we will use them out of this technique.
Let’s head to the NoteListViewController.swift file now. Initially, we should declare an array that may include Observe objects (these loaded from the database). It’s going to be the datasource of our tableview (clearly). So, on the high of the category add the next line:
Moreover that, initialize a brand new Observe object as nicely, so we will use the loadAllNotes(...) technique we created earlier:
Time to write down a extremely easy new technique that may name the one above and cargo all saved objects from the database to the notes array:
|
func loadNotes() { word.loadAllNotes { (notes) –> Void in dispatch_async(dispatch_get_main_queue(), { () –> Void in if notes != nil { self.notes = notes self.tblNotes.reloadData() } }) } } |
Discover that in spite of everything notes get loaded we use the principle thread to reload the tableview. Previous to that in fact we maintain them to the notes array.
The above two strategies are all we’d like for getting the saved notes from the database. That straightforward! Don’t neglect although that the loadNotes() have to be referred to as someplace, and this may occur within the viewDidLoad() technique:
|
override func viewDidLoad() { ...
loadNotes() } |
Loading the notes isn’t sufficient, as we should use them as soon as they’re fetched. So, let’s begin updating the tableview strategies, beginning by the full variety of rows:
|
func tableView(tableView: UITableView, numberOfRowsInSection part: Int) –> Int { return notes.depend } |
Subsequent, let’s show some word information to the tableview. To be particular, we’ll show the title, and the creation and modification dates for every word:
|
func tableView(tableView: UITableView, cellForRowAtIndexPath indexPath: NSIndexPath) –> UITableViewCell { let cell = tableView.dequeueReusableCellWithIdentifier(“idCellNote”, forIndexPath: indexPath) as! NoteCell
let currentNote = notes[indexPath.row]
cell.lblTitle.textual content = currentNote.title! cell.lblCreatedDate.textual content = “Created: (Helper.convertTimestampToDateString(currentNote.creationDate!))” cell.lblModifiedDate.textual content = “Modified: (Helper.convertTimestampToDateString(currentNote.modificationDate!))”
return cell
} |
In the event you run the app now, all notes that you’ve created to this point will likely be listed to the tableview.
Only a bit earlier we used the asyncObjectsForType(...) technique of the SwiftyDB library to load our notes from the database. This technique returns an array of objects (in our case Observe objects) as you’ve seen, and I take into account this to be fairly helpful. Nonetheless, it’s not at all times that helpful to retrieve objects from the database; there are instances the place fetching an array with the precise information values can be extra handy.
SwiftyDB will help you on that, because it supplies another manner for retrieving information. There’s a way referred to as asyncDataForType(...) (or dataForType(...) if you wish to make synchronous operations), and it returns a colletion of dictionaries on this kind: [[String: SQLiteValue]] (the place SQLiteValue is any of the allowed datatypes).
Yow will discover extra right here and right here. I go away it for you as an train to counterpoint the Observe class and cargo easy information as nicely, as an alternative of objects solely.
One of many options we wish our demo app to have is the aptitude to edit and replace an current word. In different phrases, we have to current the EditNoteViewController with the small print of a word that’s being chosen just by tapping to the respective cell, and retailer to the database its modified information as soon as it will get saved once more.
Beginning within the NoteListViewController.swift file, we’d like a brand new property for storing the ID of the chosen word, so go to the highest of the category and add the next line:
Now, let’s implement the following UITableViewDelegate technique, the place we discover the noteID worth based mostly on the chosen row, after which we carry out the segue to point out the EditNoteViewController:
|
func tableView(tableView: UITableView, didSelectRowAtIndexPath indexPath: NSIndexPath) { idOfNoteToEdit = notes[indexPath.row].noteID as Int performSegueWithIdentifier(“idSegueEditNote”, sender: self) } |
Within the prepareForSegue(...) technique let’s cross the worth of the idOfNoteToEdit to the following view controller:
|
override func prepareForSegue(segue: UIStoryboardSegue, sender: AnyObject?) { if let identifier = segue.identifier { if identifier == “idSegueEditNote” { let editNoteViewController = segue.destinationViewController as! EditNoteViewController
if idOfNoteToEdit != nil { editNoteViewController.editedNoteID = idOfNoteToEdit idOfNoteToEdit = nil } } } } |
The half job has been completed now. Earlier than we change to the EditNoteViewController class and proceed there, let’s make one other fast detour by paying a go to to the Observe class as a way to implement a easy new technique that may retrieve only a single word utilizing the ID worth that’s being given with. Right here’s the implementation:
|
1 2 3 4 5 6 7 8 9 10 11 12 13 14 15 16 17 18 |
func loadSingleNoteWithID(id: Int, completionHandler: (word: Observe!) –> Void) { database.asyncObjectsForType(Observe.self, matchingFilter: Filter.equal(“noteID”, worth: id)) { (end result) –> Void in if let notes = end result.worth { let singleNote = notes[0]
if singleNote.imagesData != nil { singleNote.photographs = NSKeyedUnarchiver.unarchiveObjectWithData(singleNote.imagesData) as? [ImageDescriptor] }
completionHandler(word: singleNote) }
if let error = end result.error { print(error) completionHandler(word: nil) } } } |
The brand new factor right here is that for first time we use a filter as a way to apply limitations to the outcomes that will likely be returned. Utilizing the equal(...) class technique of the Filter class is only a method to set the filter we wish. Don’t miss to go to this hyperlink to see extra methods for making use of filters when fetching information or objects from the database.
Through the use of the filter within the vogue proven above, we truly ask from SwiftyDB to load solely these information the place the noteID equals to the worth given as a parameter to the tactic. After all, only one file will likely be returned as a result of we all know that this subject is the first key and there’s no method to have multiple information with the identical key.
The discovered outcomes will likely be returned as an array of Observe objects, so it’s essential to get the primary (and solely) merchandise from that assortment. After that, we positively should convert the picture information (if exists) to an array of ImageDescriptor objects, and assign it to the photographs property. That’s essential, as a result of if we skip it any photographs initially added to the loaded word received’t be proven.
On the finish we name the completion handler in keeping with whether or not the word fetching was profitable or not. Within the first case we cross the fetched object to the completion handler so it may be utilized by the caller, whereas within the second case we simply cross nil as there’s no object.
Now we will head to the EditNoteViewController.swift file, and declare and initialize on the similar time a brand new Observe property to the category:
This object will likely be used firstly for calling the brand new technique we applied above, after which to include the loaded information from the database.
We’re nearly to load the word specified by the editedNoteID property utilizing the loadSingleNote(...) technique. For our objective, we’re going to outline the viewWillAppear(_:) technique, and in there we’ll develop our logic.
As you will note within the following code snippet, all values will likely be populated correctly as soon as the loadSingleNoteWithID(...) technique returns the fetched word by the completion handler. That implies that we begin setting the word title, physique, textual content shade, font, and many others, however not solely. If there are photographs included to the word, we’ll be creating photographs views for every one, utilizing in fact the frames specified within the ImageDescriptor objects.
|
1 2 3 4 5 6 7 8 9 10 11 12 13 14 15 16 17 18 19 20 21 22 23 24 25 26 27 28 29 30 31 32 |
override func viewWillAppear(animated: Bool) { tremendous.viewWillAppear(animated)
if editedNoteID != nil { editedNote.loadSingleNoteWithID(editedNoteID, completionHandler: { (word) –> Void in dispatch_async(dispatch_get_main_queue(), { () –> Void in if word != nil { self.txtTitle.textual content = word.title! self.tvNote.textual content = word.textual content! self.tvNote.textColor = NSKeyedUnarchiver.unarchiveObjectWithData(word.textColor!) as? UIColor self.tvNote.font = UIFont(title: word.fontName!, dimension: word.fontSize as CGFloat)
if let photographs = word.photographs { for picture in photographs { let imageView = PanningImageView(body: picture.frameData.toCGRect()) imageView.picture = Helper.loadNoteImageWithName(picture.imageName) imageView.delegate = self self.tvNote.addSubview(imageView) self.imageViews.append(imageView) self.setExclusionPathForImageView(imageView) } }
self.editedNote = word
self.currentFontName = word.fontName! self.currentFontSize = word.fontSize as CGFloat } }) }) } } |
Don’t miss that after having populated all values, we assign the word to the editedNote object, so we will use it in a while.
There may be one final step required: To replace the saveNote() technique, so when a word is being up to date to keep away from creating a brand new Observe object, and to not set a brand new main key and creation date.
So, discover these three traces (contained in the saveNote() technique):
|
let word = Observe() word.noteID = Int(NSDate().timeIntervalSince1970) word.creationDate = NSDate() |
… and change them with the next snippet:
|
let word = (editedNoteID == nil) ? Observe() : editedNote
if editedNoteID == nil { word.noteID = Int(NSDate().timeIntervalSince1970) word.creationDate = NSDate() } |
The remaining a part of the tactic stays as is (at the very least for now).
In the event you examined the app up up to now, then you definitely would have positively realized that the notes checklist isn’t up to date once you create a brand new word or once you replace an current one. That’s cheap to occur as a result of the app isn’t able to that but, nevertheless on this half we’re about to repair this undesirable behaviour.
As you might guess, we’re going to use the Delegation sample to inform the NoteListViewController class about adjustments made to notes within the EditNoteViewController. Our start line is to create a brand new protocol within the EditNoteViewController with two required strategies, these proven under:
|
protocol EditNoteViewControllerDelegate { func didCreateNewNote(noteID: Int)
func didUpdateNote(noteID: Int) } |
In each instances we offer to the delegate strategies the ID worth of the brand new or edited word. Now, go to EditNoteViewController class and add the next property:
|
var delegate: EditNoteViewControllerDelegate! |
Lastly, let’s revisit one final time the saveNote() technique. At first find the following line contained in the completion handler block:
|
self.navigationController?.popViewControllerAnimated(true) |
Substitute that single line with the next bunch of code:
|
if self.delegate != nil { if !shouldUpdate { self.delegate.didCreateNewNote(word.noteID as Int) } else { self.delegate.didUpdateNote(self.editedNoteID) } } self.navigationController?.popViewControllerAnimated(true) |
The right delegate perform will likely be referred to as each time {that a} new word is created or an current one is being up to date any more. However what we simply did consists of the half job solely. Let’s change to the NoteListViewController.swift file, and to begin with let’s undertake the brand new protocol to the header line of the category:
|
class NoteListViewController: UIViewController, UITableViewDelegate, UITableViewDataSource, EditNoteViewControllerDelegate { ... } |
Subsequent, within the prepareForSegue(...) technique let’s make this class the delegate of the EditNoteViewController. Proper under the let editNoteViewController = segue.destinationViewController as! EditNoteViewController line add the following one as proven to this snippet:
|
override func prepareForSegue(segue: UIStoryboardSegue, sender: AnyObject?) { if let identifier = segue.identifier { if identifier == “idSegueEditNote” { let editNoteViewController = segue.destinationViewController as! EditNoteViewController
editNoteViewController.delegate = self // Add this line.
... } } } |
Fairly good, because the many of the job has been completed. What we’re nonetheless lacking is the implementation of the 2 delegate strategies. First, let’s deal with the state of affairs the place a brand new word has been created:
|
func didCreateNewNote(noteID: Int) { word.loadSingleNoteWithID(noteID) { (word) –> Void in dispatch_async(dispatch_get_main_queue(), { () –> Void in if word != nil { self.notes.append(word) self.tblNotes.reloadData() } }) } } |
As you see, we simply fetch from the database the thing specified by the noteID parameter worth, and (if exists) we append it to the notes array and reload the tableview.
Let’s see now the following one:
|
1 2 3 4 5 6 7 8 9 10 11 12 13 14 15 16 17 18 19 |
func didUpdateNote(noteID: Int) { var indexOfEditedNote: Int!
for i in 0..<notes.depend { if notes[i].noteID == noteID { indexOfEditedNote = i break } }
if indexOfEditedNote != nil { word.loadSingleNoteWithID(noteID, completionHandler: { (word) –> Void in if word != nil { self.notes[indexOfEditedNote] = word self.tblNotes.reloadData() } }) } } |
On this case we first discover the index of the up to date word within the notes assortment. As soon as that occurs, we load the up to date word from the database and we change the outdated object with the brand new one. By refreshing the tableview, the brand new modification date of the up to date word will likely be proven immediately.
The final main characteristic that’s nonetheless lacking from our demo app is the word deletion. It’s straightforward to grasp that we’d like one final technique applied within the Observe class that will likely be referred to as evey time we wish to delete a word, so open the Observe.swift file.
The one new factor on this half is the SwiftyDB technique that performs the precise deletion from the database, as you will note within the following implementation. Like earlier than, that is yet one more operation executed asynchronously, and we’ve got a completion handler to name as soon as the execution is over once more. Lastly, there’s a filter to specify the row that ought to be deleted from the database.
|
func deleteNote(completionHandler: (success: Bool) –> Void) { let filter = Filter.equal(“noteID”, worth: noteID)
database.asyncDeleteObjectsForType(Observe.self, matchingFilter: filter) { (end result) –> Void in if let deleteOK = end result.worth { completionHandler(success: deleteOK) }
if let error = end result.error { print(error) completionHandler(success: false) } } } |
Let’s open the NoteListViewController.swift now, and let’s outline the following UITableViewDataSource technique:
|
func tableView(tableView: UITableView, commitEditingStyle editingStyle: UITableViewCellEditingStyle, forRowAtIndexPath indexPath: NSIndexPath) { if editingStyle == UITableViewCellEditingStyle.Delete {
} } |
By having added the above technique to our code, every time you swipe in the direction of left on a word cell the default Delete button will seem to the correct facet. Furthermore, the code that will likely be executed when the Delete button is tapped is the one which will likely be outlined within the physique of the if assertion above. Let’s accomplish that:
|
func tableView(tableView: UITableView, commitEditingStyle editingStyle: UITableViewCellEditingStyle, forRowAtIndexPath indexPath: NSIndexPath) { if editingStyle == UITableViewCellEditingStyle.Delete { let noteToDelete = notes[indexPath.row]
noteToDelete.deleteNote({ (success) –> Void in dispatch_async(dispatch_get_main_queue(), { () –> Void in if success { self.notes.removeAtIndex(indexPath.row) self.tblNotes.reloadData() } }) }) } } |
At first, we discover the correct word object matching to the chosen cell within the notes assortment. Subsequent, we name our new technique within the Observe class to delete it, and if that operation is profitable we take away the Observe object from the notes array and reload the tableview so we replace the UI.
It was simply that!
Probably you’re questioning how we will kind our information whereas fetching them from the database. Sorting is kind of helpful, as it may be based mostly on a number of fields, to be carried out in ascending or descending order and finally change the order of the returned information. For instance, we may kind our notes in a manner that the newest modified notes seem to the highest.
Sadly, SwiftyDB doesn’t help information sorting on the time of scripting this tutorial. This can be a drawback certainly, however there’s an answer: To manually kind the info once you want so. To display this, let’s create one final technique within the NoteListViewController.swift file referred to as sortNotes(). On this one we’ll use the Swift’s default kind() perform:
|
func sortNotes() { notes = notes.kind({ (note1, note2) –> Bool in let modificationDate1 = note1.modificationDate.timeIntervalSinceReferenceDate let modificationDate2 = note2.modificationDate.timeIntervalSinceReferenceDate
return modificationDate1 > modificationDate2 }) } |
Since NSDate objects can’t be in contrast straight, we convert them to timestamp values (double values) first. Then we carry out the comparability and we return the end result. The above code results in word sorting the place the newest modified notes are within the first positions of the notes array.
The above technique have to be referred to as every time the notes array will get modified. First, let’s replace the loadNotes technique as proven subsequent:
|
func loadNotes() { word.loadAllNotes { (notes) –> Void in dispatch_async(dispatch_get_main_queue(), { () –> Void in if notes != nil { self.notes = notes
self.sortNotes() // Add this line to kind notes.
self.tblNotes.reloadData() } }) } } |
Then, we should do the identical to the 2 following delegate strategies:
|
func didCreateNewNote(noteID: Int) { word.loadSingleNoteWithID(noteID) { (word) –> Void in dispatch_async(dispatch_get_main_queue(), { () –> Void in if word != nil { self.notes.append(word)
self.sortNotes() // Add this line to kind notes.
self.tblNotes.reloadData() } }) } } |
|
func didUpdateNote(noteID: Int) { ...
if indexOfEditedNote != nil { word.loadSingleNoteWithID(noteID, completionHandler: { (word) –> Void in if word != nil { self.notes[indexOfEditedNote] = word
self.sortNotes() // Add this line to kind notes.
self.tblNotes.reloadData() } }) } } |
By operating the app once more now, you’ll see all notes listed on the tableview based mostly on their modification date.
Undoubtably, SwiftyDB is a good instrument that can be utilized in a wide range of purposes with out a lot effort. It’s actually quick and dependable to what’s made to do, and we will all agree that may cowl a number of wants when a database have to be utilized in our apps. On this demo tutorial we went by the fundamentals of this library, however that is what you just about have to know. After all, there’s at all times the official documentation you’ll be able to check with for additional help. In our instance at this time, and for the sake of the tutorial, we created a database with one desk solely matching to the Observe class. In real-world apps although, you’ll be able to have as many tables as you need, so long as you create the respective fashions in code (let’s say the respective courses). Personally, I might positively use SwiftyDB in my initiatives, and as a matter of truth, I’m planning to take action. In any case, now you realize about it, you’ve seen the way it works and the way it may be used. It’s as much as you to determine if that is yet one more instrument in your toolbox or not. Anyway, I hope the time you spent studying isn’t wasted, and also you’ve realized one other new factor, or two. And till our subsequent tutorial comes, have all an exquisite time!
On your reference, you’ll be able to obtain the complete venture on GitHub.
[ad_2]