Physical Address
304 North Cardinal St.
Dorchester Center, MA 02124
Physical Address
304 North Cardinal St.
Dorchester Center, MA 02124

[ad_1]

To extend the vary of options and firmware security of Arduino merchandise, we determined to launch a brand new bootloader based mostly on MCUboot. Here’s a fast introduction on every little thing it’s worthwhile to find out about it.
MCUboot is a safe bootloader answer providing fail-safe firmware authentication and safe firmware replace mechanism, plus many different functionalities comparable to replace encryption, replace rollback, and utility bootstrap.
MCUboot doesn’t depend upon any particular {hardware} and working system; as of writing, the next RTOS are supported: zephyr, nuttx, mynewt, and mbed.
Our efforts have been centered on maintaining issues easy and reusing the prevailing OTA design in place on Arduino boards.
To entry the microcontroller flash, MCUboot depends on the working system driver layer. MCUboot helps multi-image booting, subsequently its configuration may be troublesome; for a primary MCUboot setup two flash areas must be outlined.
A further flash space is required to assist MCUboot swap scratch algorithm, which is named SCRATCH.
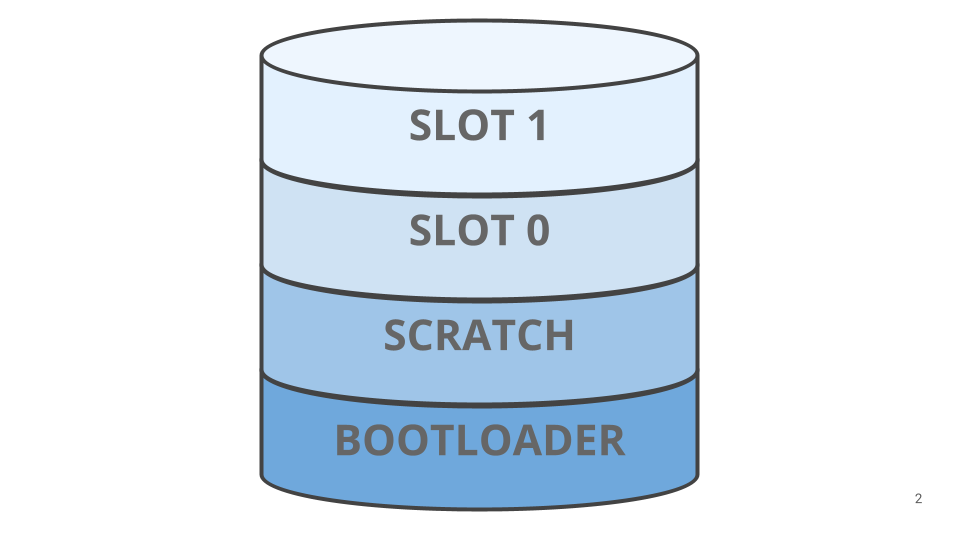
For switching between slot 1 and slot 0 MCUboot gives a number of algorithms.
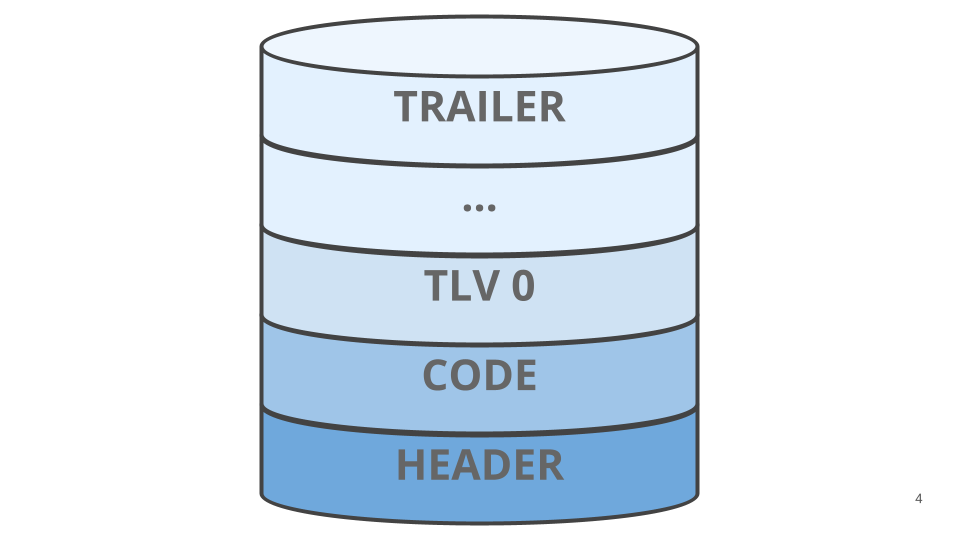
To have the ability to carry out all operations and checks, MCUboot must retailer some metadata alongside the applying picture. That is finished utilizing a device referred to as imgtool that processes the applying binary picture, reserving area and including all of the required data to carry out picture verification and implement a fault-tolerant swap.
Wanting into a picture slot in additional element we will cut up it into these flash areas:
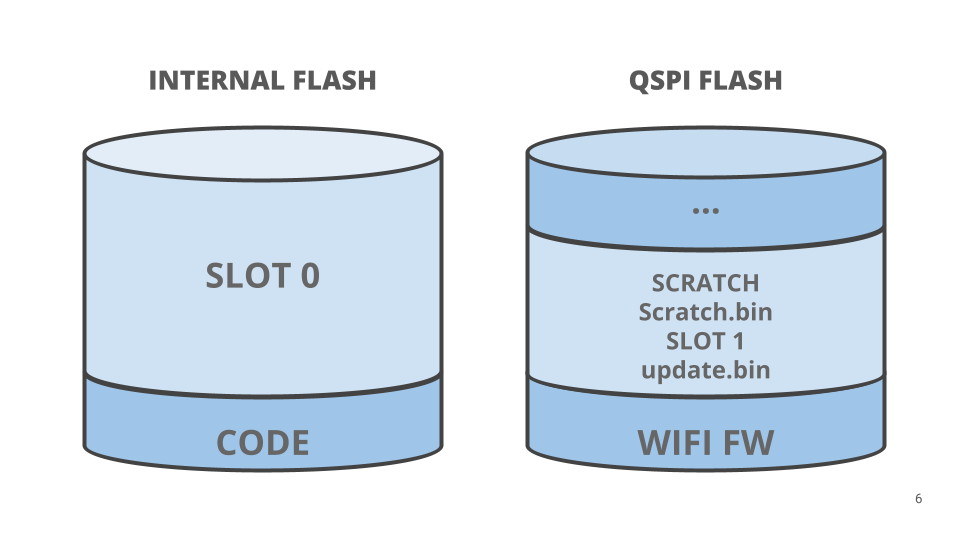
With a view to assist Arduino OTA, the replace file is written to reminiscence and processed by the bootloader to replace the applying. With reference to Portenta merchandise, the file is positioned into the second partition of the board’s QSPI flash. Which means our SLOT 1 is positioned into the QSPI flash. The default swap technique it makes use of is swap scratch. The scratch area, mapped to a file referred to as scratch.bin, is positioned into the QSPI flash. When encrypted photographs are chosen firmware copies between exterior recollections are at all times encrypted; by default, MCUboot decrypts an replace, taking good care of the wanted offsets, earlier than writing it into the scratch space. To maintain information secure an additional step is executed re-encrypting the entire scratch information earlier than writing it. When photographs are rolled again information from unencrypted inner reminiscence is encrypted earlier than being written into SLOT 1.
Observe: Utilizing this flash format, it’s doable to load an replace over the Web, mounting the system as mass storage or utilizing its DFU interface.
When a brand new replace is obtainable and marked as pending on the subsequent reset, MCUboot will maintain swapping the slots and making use of the brand new utility picture.
MCUboot makes use of two totally different keys to offer picture signature verification and picture encryption. For picture signature verification the non-public secret’s utilized by imgtool to signal the replace, and the general public secret’s utilized by MCUboot to confirm it.
For picture encryption the elliptic curve built-in encryption scheme (ECIES) is used with a secp256r1 ephemeral keypair and a random AES key used to encrypt the picture.
In each instances MCUboot must know its a part of the enter keys. Due to this fact, they’re saved within the flash reminiscence alongside the bootloader binary.
Wanting carefully on the bootloader flash sector we are going to discover the next information:
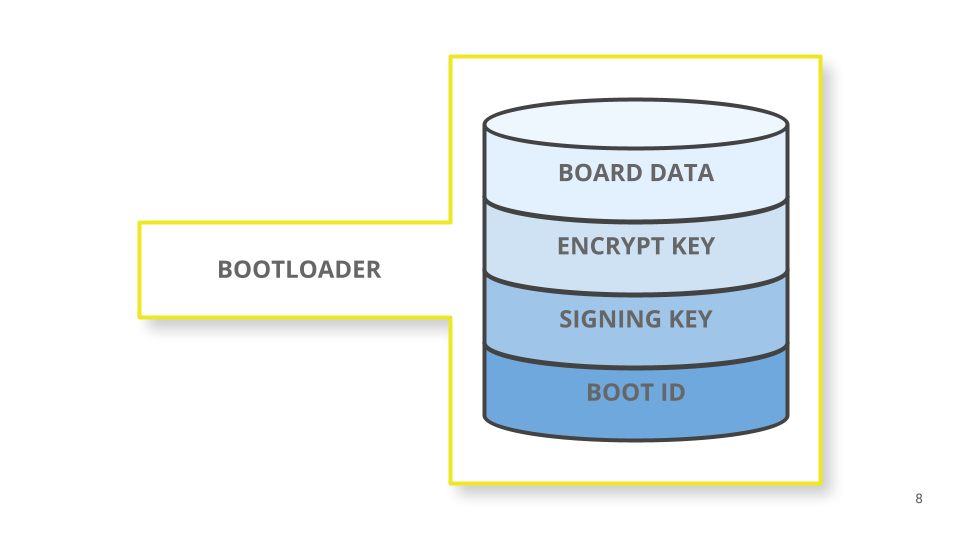
By default, keys aren’t loaded in flash, and the bootloader will boot any sketch. As soon as the keys are loaded MCUboot will at all times confirm the picture signature and boot solely legitimate sketches; if an encrypted replace is detected by studying the TLVs, MCUboot will unwrap the encryption key and decrypt the picture on-the-fly whereas transferring it into the interior flash.
Click on under to provide the Arduino MCUboot a attempt, and be part of us on social media or within the boards to inform us what you suppose!
You possibly can observe any responses to this entry by means of the RSS 2.0 feed.
You possibly can depart a response, or trackback from your personal website.
[ad_2]